¶ Technical details
| Model | Pierre Controller |
| Dimensions (width x height x depth; weight) | 150mm x 82mm x 30mm; 215g |
| Power | 12V |
| Maximal load | 2A |
| Maximum load per output | 1A |
| Consumption | 0.8W |
| Basic cables for connecting controllers | UTP |
| Number of inputs | 16 |
| Number of outputs | 16 |
| Number of digital inputs/outputs | 8 |

| 1. |
INPUT - from 1 to 16 ports. INPUT for sensor wires and buttons |
| 2. | Power supply for the sensor |
| 3. | PLUS - MINUS connection to a voltage of 12 V |
| 4. | PLUS - MINUS connection to a voltage of 5 V |
| 5. | ETH - Connecting to the network |
| 6. | Reset button |
| 7. |
OUTPUT - from 1 to 16 ports. OUTPUT to wire the corresponding actuator device that will activate when it receives input from the sensors or buttons. |
| 8. | GRD - Ground wire (-) |
| 9. | A combination of digital inputs or outputs |
| 10. | Digital input - 2 ports used only for RFID communication (Wiegand 34bit) |
| 11. | AP - access point |
| 12. | LED - indicator of network connection |
¶ CE Declaration of conformity

¶ Put controller online / AP mode
Hold the AP button five seconds, LED will be light blue.
¶ Setup new controller
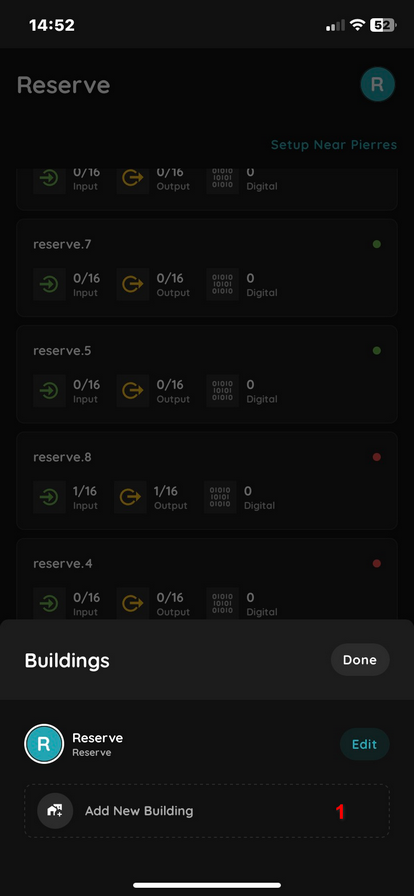
1. Pierre Partner app - Buildings - Add new building - Create a Building for your new controllers. In this Building, there can be one or even more controllers.
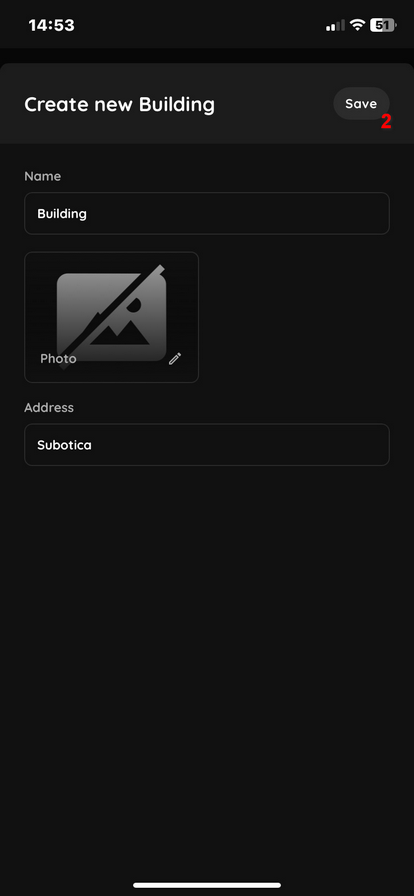
2. Enter name and address and Save
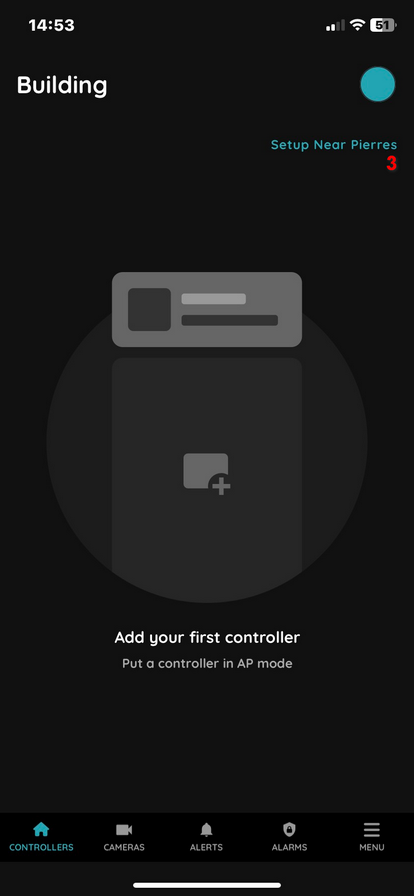
3. Click Setup Near Pierres
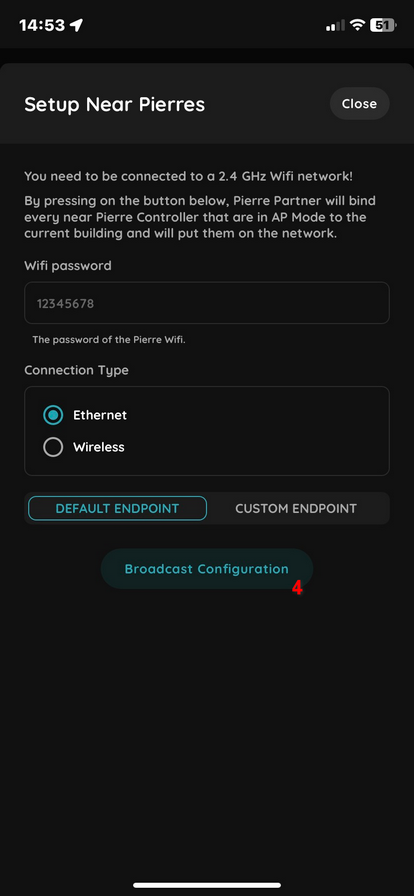
4. WiFi must be 2.4GHz! Connect your mobile phone to the 2.4GHz WiFi. In Pierre Partner enter the password of your WiFi network. WiFi password is needed for controller activation.
Other method, turn on your mobile phones Mobile Hotspot and in Pierre Partner enter the password of your Hotspot password.
Connection Settings: Choose how the Pierre controller will work after successful activation. Selecting Ethernet requires to connect ethernet cable with internet access.
Default endpoint and click Broadcast Configuration
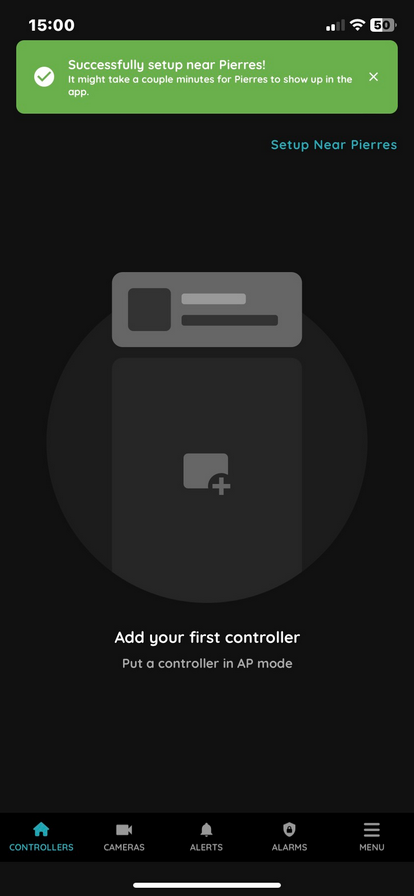
Successfully setup near Pierres! It might take a couple minutes for Pierre controller show up in the Partner application.
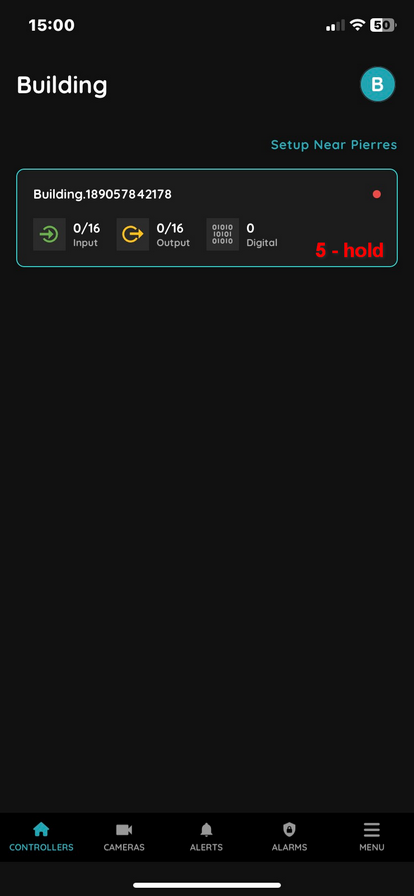
5. Press and hold on the controller to rename it
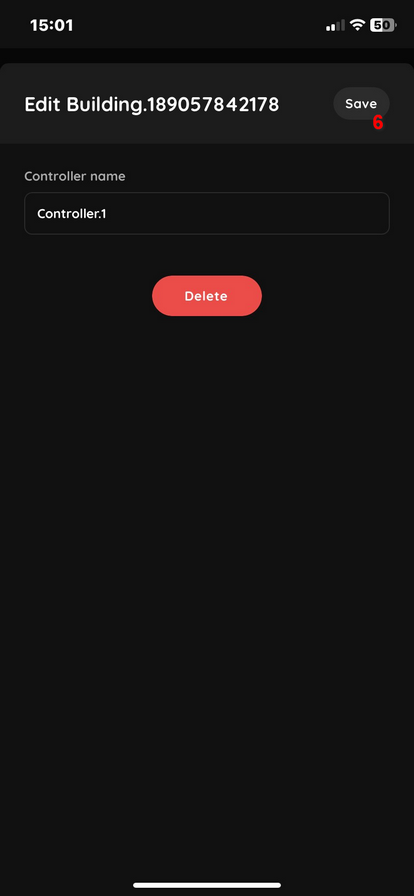
6. Enter the new name and click save.
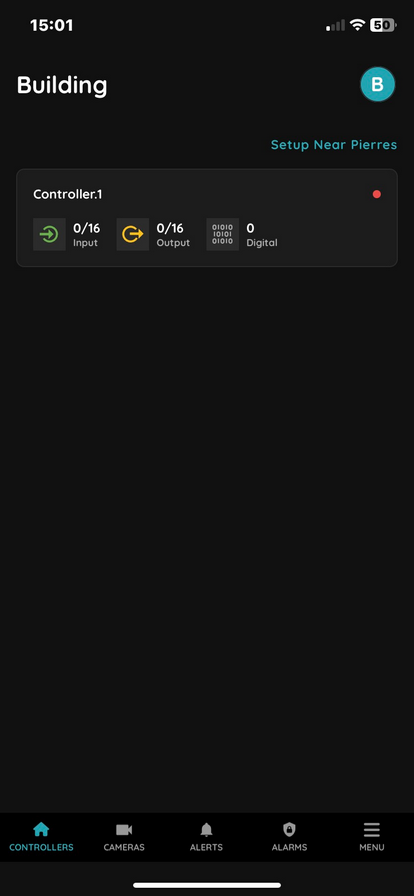
New Pierre controller is added to your Building.
¶ Change Ethernet or WIFI connection on Pierre Controller
Power on the controller and press the AP button on the controller.
AP mode will be activated, white/light blue LED will illuminate.
Open WiFi settings on your mobile phone. A new WiFi device will be available to connect.
SSID is Pierre_NameOfTheController. Connect to this device.
When connected in browser type in 192.168.4.1
Two connection types are available:
Ethernet or WiFi.
Choose Ethernet for wired internet connection.
Choose WiFi for wireless internet connection, but it must operate at 2.4GHz.
For WiFi you have to enter the SSID and password of the network you want to use in the future.
Network configuration: DHCP or static IP address.
Server endpoint and MQTT URL: please do not change these settings.
Save network configuration and then click on the REBOOT tab.
Authorization settings remain unchanged.
¶ Change Authorization on Pierre Controller
Caution: Only change these settings if you know what you want to do and have all the necessary data.
Power on the controller and press the AP button on the controller.
AP mode will be activated, white/light blue LED will illuminate.
Open WiFi settings on your mobile phone. A new WiFi device will be available to connect.
SSID is Pierre_NameOfTheController. Connect to this device.
When connected, open a browser on your mobile phone and type in 192.168.4.1
First select and Save Network Configuration.
Even if no changes have been made, the network configurations must still be saved.
Select the Authorization tab and enter the username and password provided by Pierre Support Team.
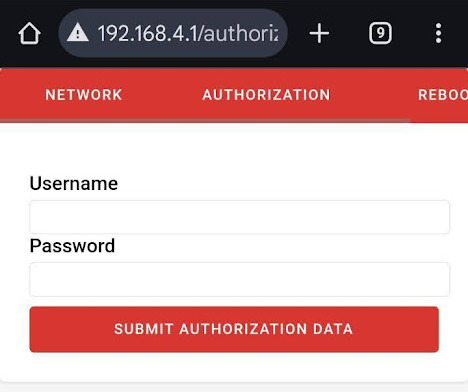
Enter Username and Password then click a few times on Submit Authorization Data.
Last step, click the REBOOT tab and the controller will reboot automatically.
If everything is done correctly, the green LED light should illuminate.
¶ Enable Pierre Controller to support 0-10V control
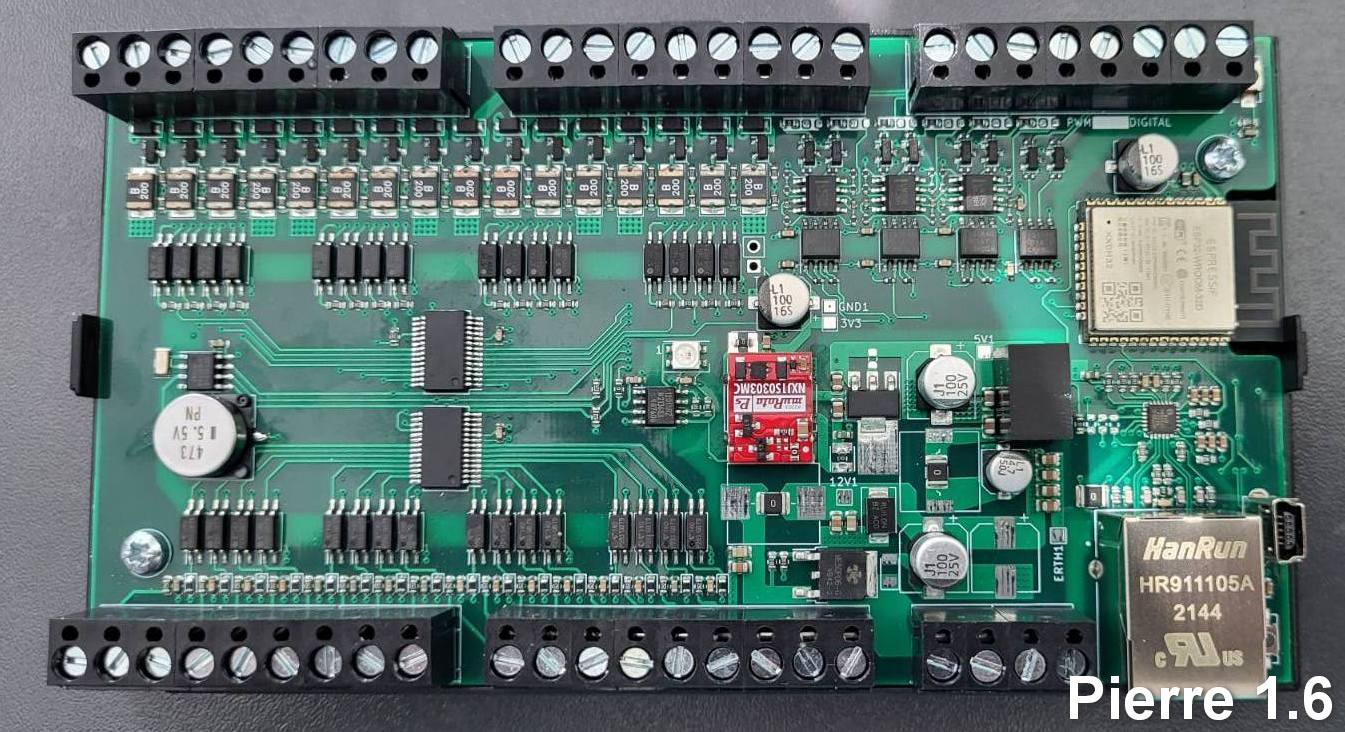
Pierre Controller 1.6 - Digital I/O 1, 3, 5 ports can be 0-10V.
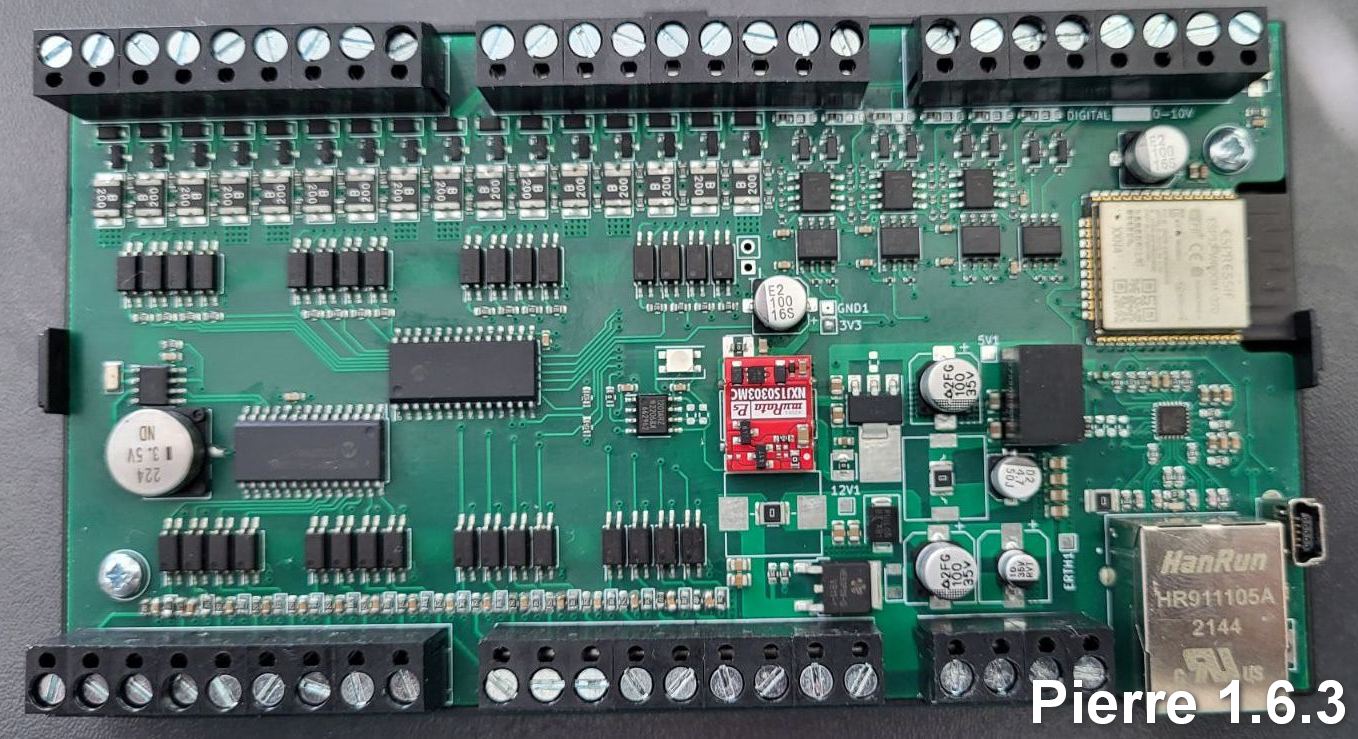
Pierre Controller 1.6.3 - Digital I/O 1-6 ports can be 0-10V.
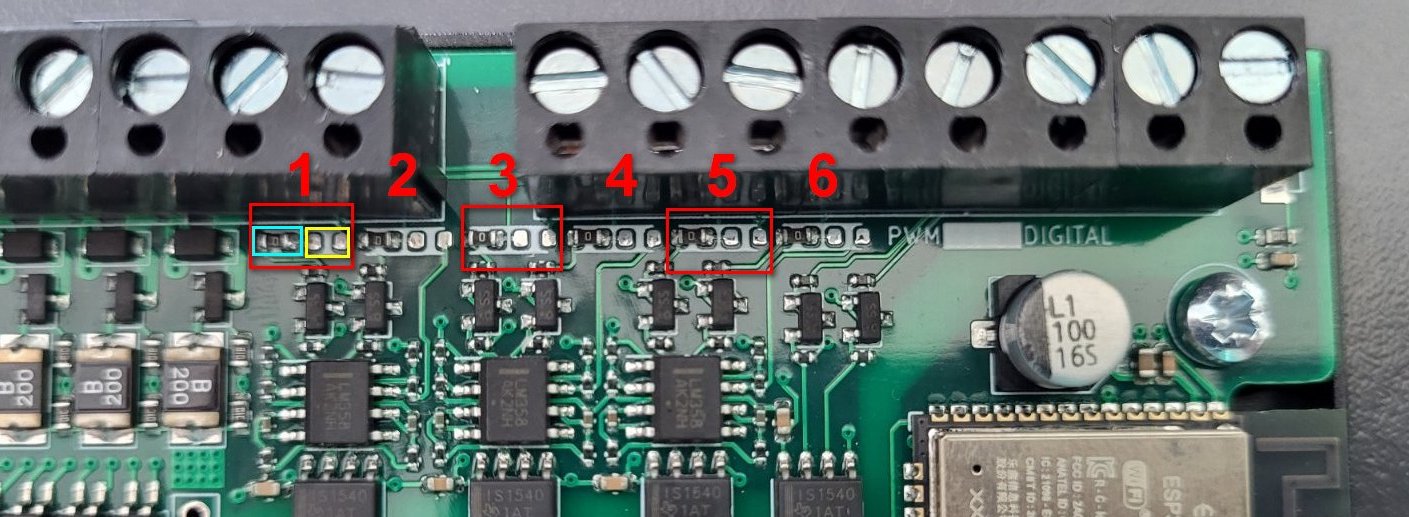
Port 1 - resistor from the BLUE area solder to the YELLOW area.
Follow the steps on other ports.
For Pierre 1.6 - only 1, 3, 5 ports are 0-10V capable.
For Pierre 1.6.3 - from 1 - 6 ports are 0-10V capable.
¶ Controller power supply - compatible devices
.png)
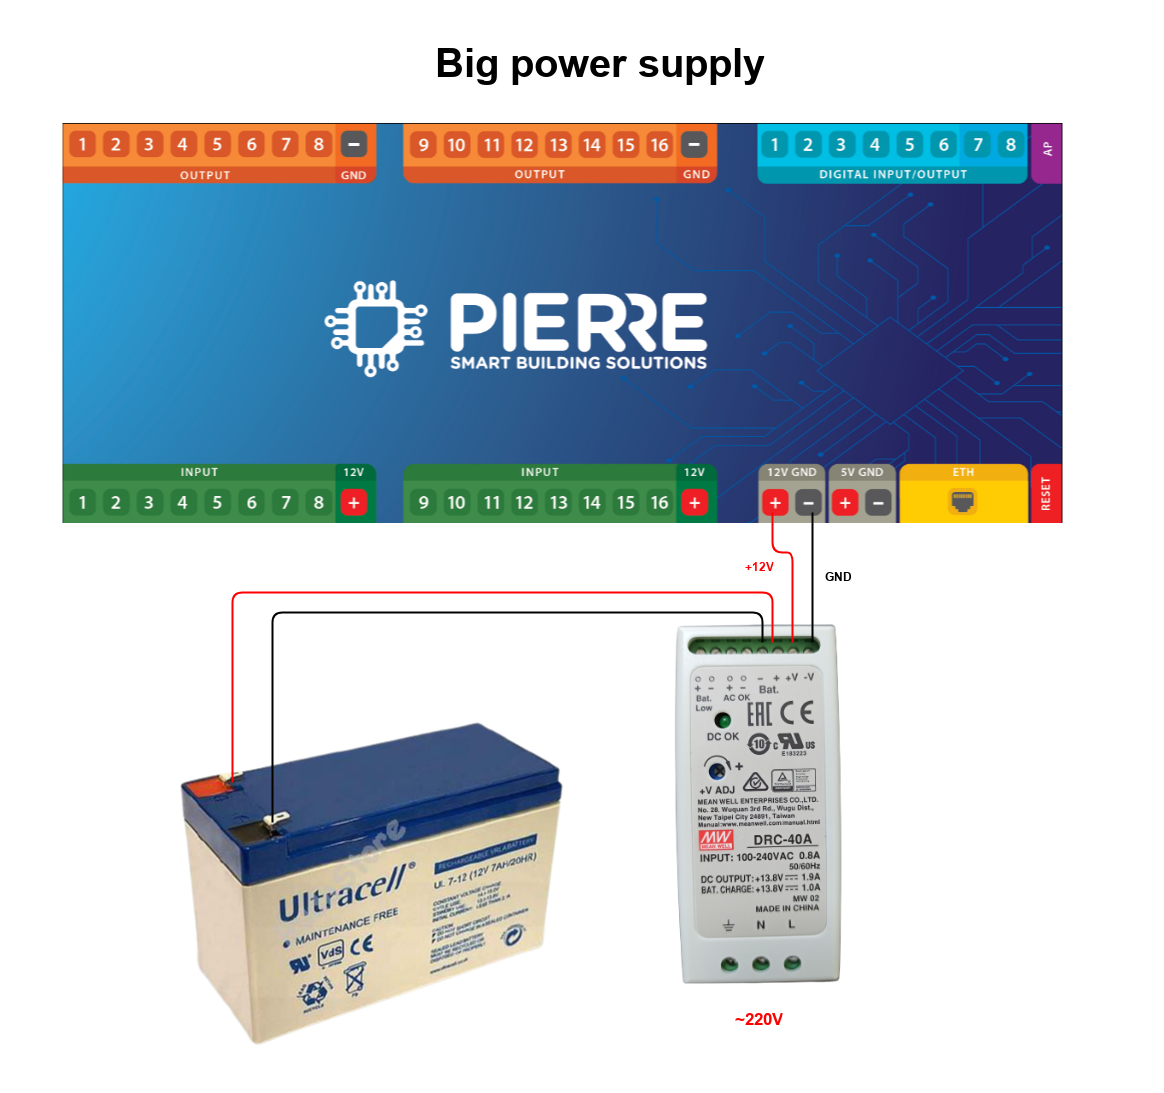
Controller wiring on multi controller setups.
Losing internet connection means losing basic functions because of incorrect wiring.
Temperature sensor and a heating/cooling device must be on the same controller.
Buttons and lights/blinds must be on the same controller.
Flood sensor and electric water valve must be on the same controller.
¶ Compatible devices
Small power supply MeanWell HDR-15-12
AC/DC Power Supply - 1 Output - 12V@1.25 - 15W
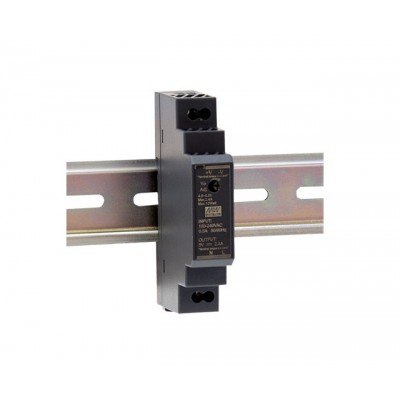
https://www.meanwell-web.com/en-gb/ac-dc-ultra-slim-din-rail-power-supply-input-range-hdr--15--12
Medium power supply MeanWell HDR-30-12
AC/DC Power Supply - 1 Output - 12V@2A - 30W

https://www.meanwell-web.com/en-gb/ac-dc-ultra-slim-din-rail-power-supply-input-range-hdr--30--12
Big power supply with ups MeanWell DRC-40A
AC/DC Power Supply - 2 Outputs - 13.8/13.8V@1.9/1A - 40W
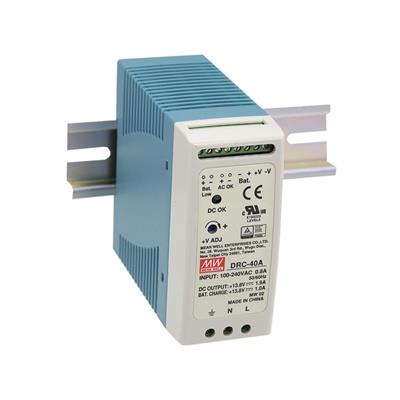
https://www.meanwell-web.com/en-gb/ac-dc-industrial-din-rail-with-ups-function-output-drc--40a
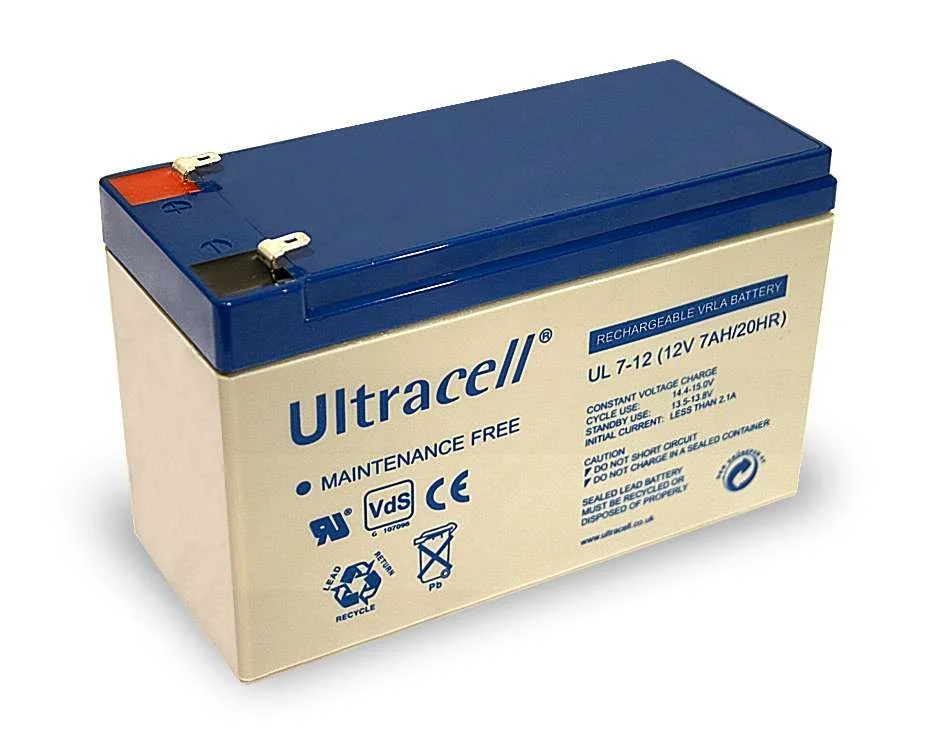
UPS - Ultracell battery 12V 7Ah
